Curriculum 'endoACRO - Site User Training'
19. Transfer patient Download PDF
1 Transfer patients interface
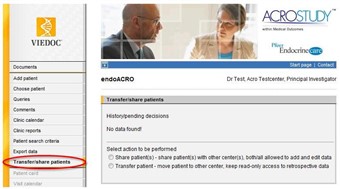
- Only users with the role Principal Investigator have access to the Transfer patients interface.
- Click the left hand menu [Transfer/share patients] to access the interface for transferring patients.
- The top section on the page is "History/pending decisions" which contains the history of transferred and shared patients as well as pending requests for patient transfer and share.
- Contact helpdesk if you need help.
2 Steps to transfer a patient
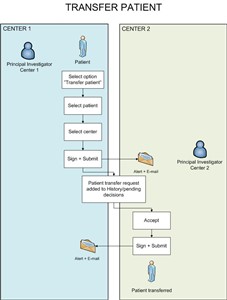
- To transfer a patient go to Transfer/share patients and click the option "Transfer patient - move patient to other center, keep read-only access to retrospective data".
- Select which patient to transfer by using the option button in front of the patient in the listing.
- The next step is to select which center to transfer the patient to in the drop-down list "Submit transfer request to". All centers located in the same country are listed in the drop-down list.
- NOTE! To transfer a patient to a center in another country you must contact Helpdesk.
- When you have selected patient to transfer and the center, sign the transfer request and click the Submit link. When the request is submitted an email is sent to users with Principal Investigator role at the other center. An alert is also added in the Message center.
- The transfer request is added to the "History/pending decisions" section at the top of the page.
(You can at this point recall the request by clicking the Recall link in which case an email will be sent again and a new alert entered for this in the Message center.) - When a Principal Investigator at the other center logs in to the study he/she will see the alert in the Message center and can go directly from here to the "Transfer/share patients" page by clicking the "Go to list" button.
- In the "History/pending decisions" section, on the Transfer/share patients page, the user will see the pending request for transfer to the center and can now accept or reject the request by using the Accept and Reject links.
- To accept the transfer request click Accept and sign with your password and the patient is moved to the new center. The Patient ID for the patient is also changed to reflect the center number of the new center.
- After a patient has been transferred a new row for center is visible in the visit calendar for that patient. The center row displays the short name for the center that created the visit.
- If the patient transfer is rejected an email is sent to the Principal Investigator at the requesting center. The patient is not transferred and the patient rejection is displayed in the "History/pending decisions" section.
3 Patient data after transfer
- When a patient has been transferred to a new center all patient data is owned by the new center.
- The old center has read-only access to patient data that was entered by their own center. Data entered by the new center is not visible for the old center.
- The old center can separate a transferred patient from the regular patients by looking at the Patient ID which is different for the transferred patient as it reflects the new center ID.